Objectives
Build an application the can facilitate upload and display of images in Gomix.
Setup
In Gomix, create a new project and then import this to replace the default content:
You do this be going to the advanced menu, select Import from Github and enter edeleastar/gomix-template-2
Explore the UX. It is a variant on the template we have been already using, except this one has user accounts built in.
There are already 2 accounts pre-loaded (Homer and Marge). Try these out - and also try registering a new user.
Review the source - it should be familiar from earlier labs.
Express Libraries
package.json
We need to add some modules to our application to support image upload and the cloudinary API. These are included in the package.json file like this:
...
   "express-fileupload": "^0.1.2",
   "cloudinary": "^1.8.0",
...
Here is how the package.json dependencies section should look now:
...
  "dependencies": {
    "body-parser": "^1.15.2",
    "cookie-parser": "^1.4.3",
    "express": "^4.14.0",
    "express-fileupload": "^0.1.2",
    "cloudinary": "^1.8.0",
    "express-handlebars": "^3.0.0",
    "lodash": "^4.17.3",
    "lowdb": "^0.14.0",
    "uuid": "^3.0.1",
    "winston": "^2.3.0"
  },
...
When editing the package.json file in gomix, make sure to keep the logs open - so you can see if there are any typos/errors immediately.
If you are working fully offline, on your own workstations, then the following commands - entered from within the project folder - will update package.json for you automatically:
npm install express-fileupload --save
npm install cloudinary --save
server.js
We also need to include this module in server.js and initialise it correctly:
...
const fileUpload = require('express-fileupload');
...


...
app.use(fileUpload());
...
Here is the full server module:
'use strict';

const express = require('express');
const logger = require('./utils/logger');
const bodyParser = require('body-parser');
const cookieParser = require('cookie-parser');
const fileUpload = require('express-fileupload');

const app = express();
app.use(cookieParser());
const exphbs = require('express-handlebars');
app.use(bodyParser.urlencoded({ extended: false, }));
app.use(express.static('public'));
app.use(fileUpload());
app.engine('.hbs', exphbs({
  extname: '.hbs',
  defaultLayout: 'main',
}));
app.set('view engine', '.hbs');

const routes = require('./routes');
app.use('/', routes);

const listener = app.listen(process.env.PORT || 4000, function () {
  logger.info(`gomix-template-1 started on port ${listener.address().port}`);
});
Make sure the app starts without any errors and functions as expected.
The Picture Store
We will encapsulate our picture storage in a new module in the models folder called picture-store.js:
models/picture-store.js
'use strict';

const _ = require('lodash');
const JsonStore = require('./json-store');
const cloudinary = require('cloudinary');
const path = require('path');
const logger = require('../utils/logger');

try {
  const env = require('../.data/.env.json');
  cloudinary.config(env.cloudinary);
}
catch(e) {
  logger.info('You must provide a Cloudinary credentials file - see README.md');
  process.exit(1);
}

const pictureStore = {

  store: new JsonStore('./models/picture-store.json', { pictures: [] }),
  collection: 'pictures',

  getAlbum(userid) {
    return this.store.findOneBy(this.collection, { userid: userid });
  },

  addPicture(userId, title, imageFile, response) {
    let album = this.getAlbum(userId);
    if (!album) {
      album = {
        userid: userId,
        photos: [],
      };
      this.store.add(this.collection, album);
    }

    imageFile.mv('tempimage', err => {
      if (!err) {
        cloudinary.uploader.upload('tempimage', result => {
          console.log(result);
          const picture = {
            img: result.url,
            title: title,
          };
          album.photos.push(picture);
          response();
        });
      }
    });
  },

  deletePicture(userId, image) {
    const id = path.parse(image);
    let album = this.getAlbum(userId);
    _.remove(album.photos, { img: image });
    cloudinary.api.delete_resources([id.name], function (result) {
      console.log(result);
    });
  },

  deleteAllPictures(userId) {
    let album = this.getAlbum(userId);
    if (album) {
      album.photos.forEach(photo => {
        const id = path.parse(photo.img);
        cloudinary.api.delete_resources([id.name], result => {
          console.log(result);
        });
      });
      this.store.remove(this.collection, album);
    }
  },
};

module.exports = pictureStore;
You do not need to understand this code in order to use it. Essentially, we just need to understand how to call these three methods:
  addPicture(userId, title, imageFile, response) {
    ...
  }
  ...
  deletePicture(userId, image) {
    ...
  },
  ...
  deleteAllPictures(userId) {
  }
  ...
These are the only methods we will need to call on the pictureStore object. We will see these in action in the next steps.
Before moving on, though, you now need the file of credentials we created in the last lab when we signed up to the cloudinary service.
.data/.env.json
{
  "cloudinary": {
    "cloud_name": "YOURID",
    "api_key": "YOURKEY",
    "api_secret": "YOURSECRET"
  }
}
Create a folder called '.data' - this will be private in Glitch. Then create a file called .env.json in that folder containing your credentials as shown.
NB: It is very important to keep your credentials in the .data folder - as they will be hidden from any Glitch users who wish to remix your app.
Dashboard
Here is a replacement for the Dashboard view:
views/dashboard.hbs
{{> menu id="dashboard"}}

<section class="ui segment">
  <h1 class="ui header">
    Welcome {{user.firstName}} {{user.lastName}}
  </h1>

  <section class="ui raised segment">
    <h1 class="ui header">
      Your Pictures:
    </h1>
  </section>

  <section class="ui raised segment">
    <div class="ui small dividing header"> Picture Upload </div>
    <section class="ui raised form segment">
      <form action="/dashboard/uploadpicture" method="post" enctype="multipart/form-data">
        <div class="two fields">
          <div class="field">
            <label>First Name</label>
            <input type="file" name="picture">  </input>
          </div>
          <div class="field">
            <label>Title</label>
            <input placeholder="Title" type="text" name="title">
          </div>
        </div>
        <button class="ui mini blue submit button"> Upload </button>
      </form>
    </section>
  </section>
</section>
The dahboard should look like this:
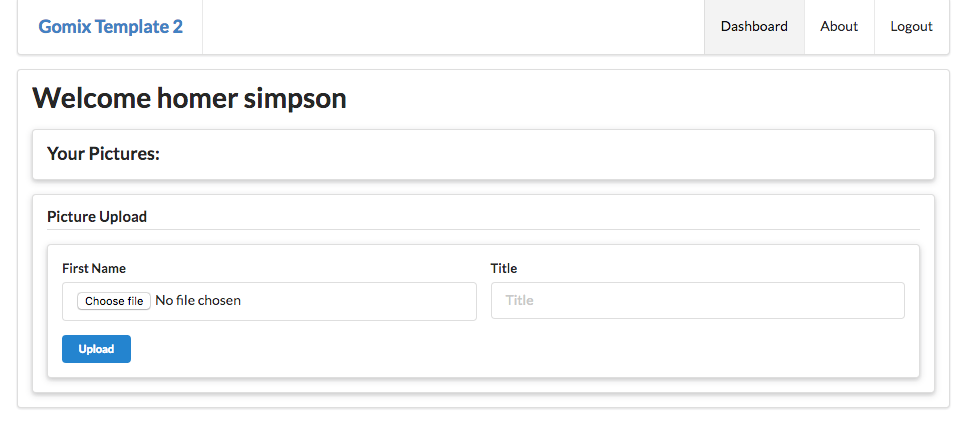
The UI for uploading a picture should work - try to upload one now. When you press the 'upload' button you will get this:
Cannot POST /dashboard/uploadpictureThis is because the form action route is not yet implemented:
...
      <form action="/dashboard/uploadpicture" method="post" enctype="multipart/form-data">
...
Picture Routes
We can bring in this new route now:
routes.js
...
router.post('/dashboard/uploadpicture', dashboard.uploadPicture);
...
Here is a new version of the dashboard.js module:
controllers/dashboard.js
'use strict';

const logger = require('../utils/logger');
const accounts = require('./accounts.js');
const pictureStore = require('../models/picture-store.js');

const dashboard = {
  index(request, response) {
    logger.info('dashboard rendering');
    const loggedInUser = accounts.getCurrentUser(request);
    const viewData = {
      title: 'PictureStore Dashboard',
      user: loggedInUser,
      album: pictureStore.getAlbum(loggedInUser.id),
    };
    response.render('dashboard', viewData);
  },

  uploadPicture(request, response) {
    const loggedInUser = accounts.getCurrentUser(request);
    pictureStore.addPicture(loggedInUser.id, request.body.title, request.files.picture, function () {
      response.redirect('/dashboard');
    });
  },
};

module.exports = dashboard;
Try this now, and upload a picture - pick a small image from somewhere on your local machine. It will not display yet - but it should upload successfully.
Because of the lag in how gomix works, it may take a little while for picture-store.json to refresh. When it eventually does, it may look something like this:
models/picture-store.json
{
  "pictures": [
    {
      "userid": "3ad52697-6d98-4d80-8273-084de55a86c0",
      "photos": [
        {
          "img": "http://res.cloudinary.com/edel020/image/upload/v1490458845/ncmyd6i1brylui1senk9.png",
          "title": ""
        }
      ]
    }
  ]
}
Log in to your cloudinary account and see if the image is in your Media Library. Also, see if the image url corresponds with the "img" url in your picture-store.json file (if you can load it).
Our pictures will not appear on our dashboard yet however (next steps).
Displaying Pictures
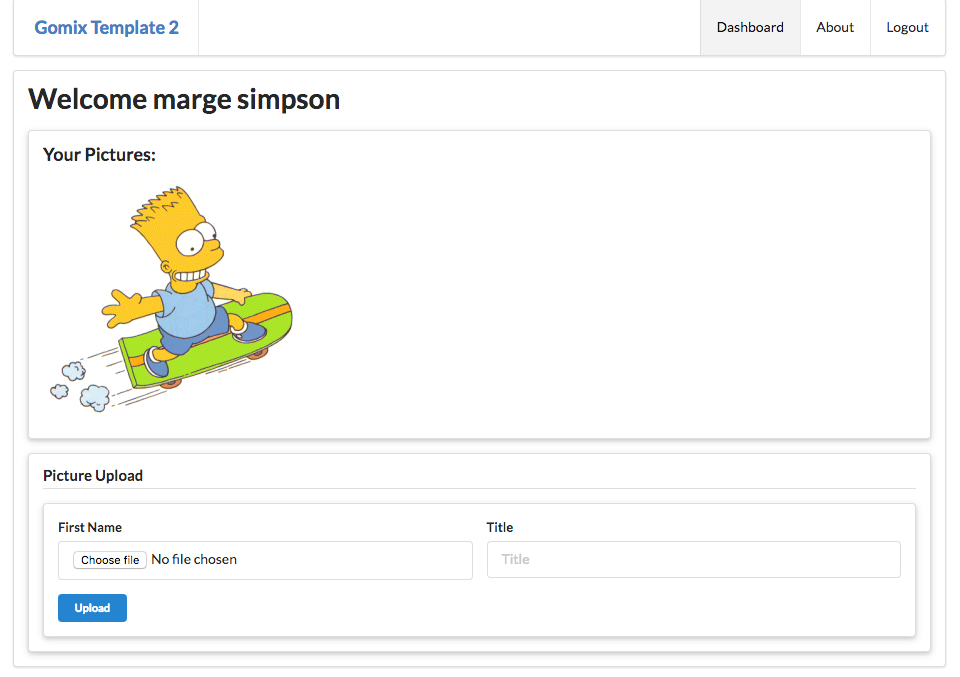
To Display the pictures, replace the pictures segment on dashboard with this:
...
  <section class="ui raised segment">
    <h3 class="ui header">
      Your Pictures:
    </h3>
    {{#each album.photos}}
      <img src="{{img}}">
    {{/each}}
  </section>
...
When you log in now again, and if you upload some pictures, they will appear on the dashboard.
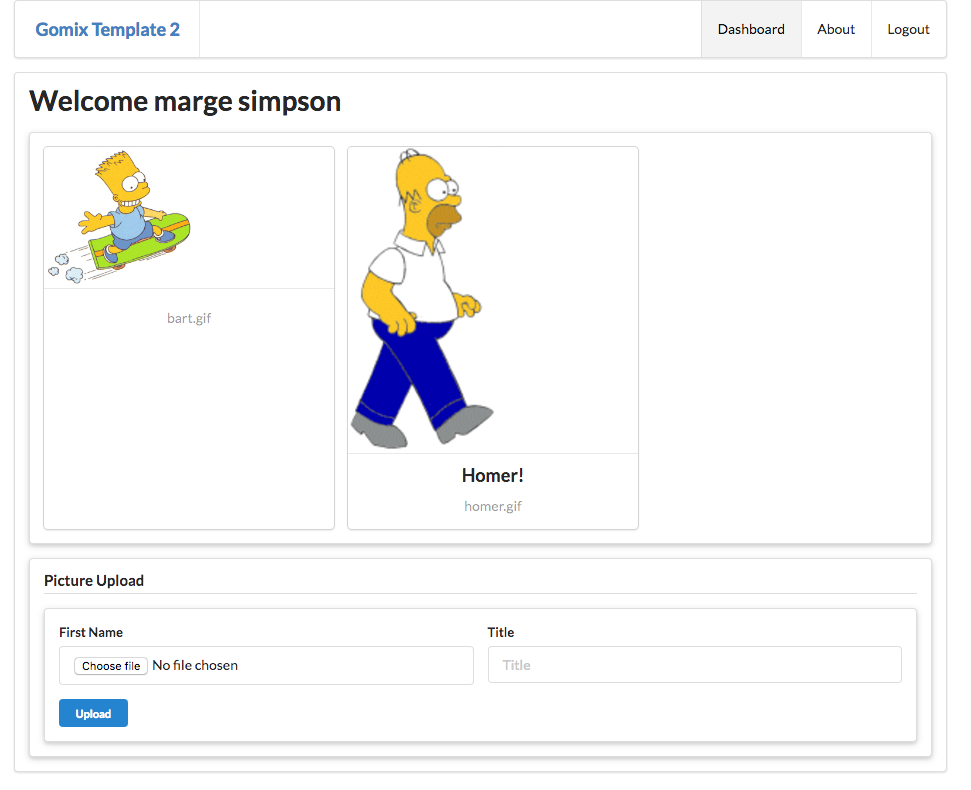
Cards
We could improve the layout by bringing in the following partial:
views/partials/card.hbs
<div class="ui card">
  <div class="ui small center aligned image">
    <img src="{{img}}">
  </div>
  <div class="content">
    <p class="center aligned header">{{title}}</p>
    <div class="center aligned meta">
    </div>
  </div>
</div>
... and we can replace the picture segment on the dashboad with this:
views/dashboard.hbs
...
  <section class="ui raised segment">
    <h3 class="ui header">
      Your Pictures:
    </h3>
    <div class="ui cards">
      {{#each album.photos}}
        {{> card }}
      {{/each}}
    </div>
  </section>
...
Try it now:

If we add a title to the picture when we upload, it should appear in the card:
Deleting Photos
Finally, we can bring in controls to delete images, either individually for in bulk. First the new routes:
routes.js
...
router.get('/dashboard/deleteallpictures', dashboard.deleteAllPictures);
router.get('/dashboard/deletepicture', dashboard.deletePicture);
...
This is the implementation of the Dasboard delete actions:
controllers/dashboard.js
...
  deleteAllPictures(request, response) {
    const loggedInUser = accounts.getCurrentUser(request);
    pictureStore.deleteAllPictures(loggedInUser.id);
    response.redirect('/dashboard');
  },

  deletePicture(request, response) {
    const loggedInUser = accounts.getCurrentUser(request);
    pictureStore.deletePicture(loggedInUser.id, request.query.img);
    response.redirect('/dashboard');
  },
...
Delete All
Plant this button somewhere in the dashboard view:
views/dashboard.hbs
...
  <div class="ui segment">
    <a href="/dashboard/deleteallpictures"> <button class="negative ui button">Delete All</button></a>
  </div>
...
Run the app now, locate and press the Delete All button. It should remove all pictures for the logged in user. When you try it, check the Cloudinary web interface to see if the images are actually removed.
Delete a single picture
To delete a single picture, we need this routes:
.. and a new version of the card which will include a delete (trash can) button:
views/partials/card.hbs
<div class="ui card">
  <div class="ui small center aligned image">
    <img src="{{img}}">
  </div>
  <div class="content">
    <p class="center aligned header">{{title}}</p>
    <div class="center aligned meta">
      <a href="/dashboard/deletepicture?img={{img}}">
        <i class="red icon trash"></i>
      </a>
    </div>
  </div>
</div>
See if you can delete individual pictures now.
Solution
This is the completed application:
If you are in Gomix - import the project from github: edeleastar/gomix-image-store
Exercise 1: Download and run Locally
Download the project and run it on our own workstation. Remember, after downloading you must run:
npm installfrom inside the project folder, and then run:
npm startto run. Browse to
to see it in action. Experiment with uploading some pictures. However, you must have your own .env file locally if this to work:
.env.json
{
  "cloudinary": {
    "cloud_name": "YOURID",
    "api_key": "YOURKEY",
    "api_secret": "YOURSECRET"
  }
}